A Comprehensive Guide on How to Easily Record Steam Gameplay.
Don’t Know How to Record Your Favorite Steam games? This Guide Will Teach You Step-By-Step How to Record Steam Gameplay Like a Pro!
This Post is on How to Record Steam Gameplay?
Are you a die-hard Steam gamer ready to show off your skills and share them with the world?
I totally get it. After all, who doesn’t love watching epic gaming fails or witnessing amazing victories in action!
If that’s what you’re looking for, then Recording your Steam Gameplay is the perfect way to do it.
From creating engaging content for your followers to improving your own gaming abilities by reviewing past matches…
…there are plenty of reasons why every Steam gamer should know how to record their game sessions.
But with so many screen recording options out there, it can be daunting to figure out where to start.
That’s why we’ve created this helpful guide on how to easily record Steam gameplay.
Here’s what we’ll cover:
- Basic Techniques & Tips
- Enhancing Your Recordings
- Troubleshooting Common Issues
- And more…
So grab a cup of coffee (or energy drink) and let’s dive into mastering the art of recording Steam gameplay like a pro.

Who knows – you may even become an internet sensation!
How to Record Steam Gameplay? (Key Highlights)
As gamers, we all know the power of sharing our best moments.
With just a few simple steps, you can easily record your Steam gameplay using Windows’ Game Bar, software like Bandicam and Simple Video Recorder, or even Joyoshare VidiKit!
Here’s how:
- To record with the Game Bar, press Windows key and G at the same time, then click the ‘Record’ button.
- For more control over recording settings, try programs such as Bandicam or Simple Video Recorder. Just select the ‘Game Recording’ mode in the program, launch the game on Steam, and click the ‘Record’ button to start capturing your epic moves.
- If you’re looking for even more features, check out Joyoshare VidiKit. Download and launch the software, then click the gear icon to adjust recording settings.
- Last but not least, use the handy Windows shortcut keys of Windows Alt R to quickly start recording your gameplay on Steam.
So don’t wait any longer–get ready to share your greatest gaming feats with the world!
As they say, “A picture is worth a thousand words,” so why not capture some amazing screenshots and videos of yourself playing your favorite games?
Understanding The Importance Of Recording Steam Gameplay
Recording Steam gameplay can be a great way to capture your gaming moments, improve your skills and share them with friends and family.
It’s a wonderful way of re-living awesome experiences without having to start the game all over again!
Here are three reasons why recording Steam gameplay is important:
- It allows you to save and watch your favorite game moments at any time.
- You can use your recordings to create YouTube videos or stream on Twitch.
- Some games only offer limited replay value – but recording will help you relive those amazing initial playthroughs.
So don’t worry if you feel like you’re missing out by not capturing your gaming sessions – just hit that record button and enjoy!
You never know what kind of amazing memories you’ll be able to keep forever.
By the way, I will show you how easy it is to record your steam gameplay.
Techniques For Recording Steam Gameplay
Learn the various methods for recording Steam gameplay, including using Windows Game Bar, OBS Studio, and NVIDIA ShadowPlay.
Explore which technique works best for you and take your gaming content to the next level.
Keep reading to discover more!
Using Windows Game Bar/Using Xbox Game Bar
As a Steam user, one of the easiest ways to record your gameplay is by using the Windows Game Bar.
This built-in feature on Windows 10 & Windows 11 allows you to capture up to two hours of footage with the simple press of a button.
All you need to do is press the Windows key and G, and a toolbar will appear on your desktop.
To record full-screen PC games, use the keyboard shortcut Windows logo key + Alt + G.
Once you’re finished recording, clips can be edited using the Xbox app. With this tool, you can trim videos, add captions, and more – all without having to install any third-party software. It’s that easy!
So don’t wait – start capturing high-quality gameplay footage today with just a few clicks.
Here are some additional tips to help you get started:
- Make sure you have the latest version of Windows 10 or Windows 11 installed
- Adjust your screen resolution before you begin recording.
- Pause your game when you need to take a break or make adjustments.
- Use the highest video settings available for the best results.
Using Bandicam
One of the easiest ways to record Steam gameplay is by using Bandicam.
This popular screen recording program allows users to easily capture their gameplay and videos of screen activity on their computer.
To get started:
# Step 1: First, download the Bandicam software on your PC.
# Step 2: Next, select the “Game Recording mode” option in Bandicam and start your game on Steam.
# Step 3: Once you’re ready to start recording, click the “Record” button or press the hotkey F12.
# Step 4: If you want to capture your gameplay and webcam simultaneously, select the gamepad option.
Bandicam offers high-quality gameplay recording and an easy-to-use interface, making it the best choice for recording gameplay.
Remember to save your recording once you’re finished, and you’re all set. Enjoy recording your favorite Steam games with Bandicam!
Using Joyoshare
When it comes to recording your Steam gameplay, Joyoshare is a highly recommended software for 2023.
With Joyoshare Screen Recorder, you can easily record your game videos in full screen or customized regions according to your preference.
The software also allows users to add webcam and audio commentary to their recordings.
Another great feature of Joyoshare is its support for watermarking video.
This means that you can protect your gaming clips from being stolen or copied by adding a custom watermark to them.
To record Steam gameplay using Joyoshare:
- Start by downloading and installing the software on your computer.
- Once installed, open Joyoshare and select the recording options you want, such as whether to record audio, video, or both.
- Customize recording settings to capture a specific area of the screen, DirectX or OpenGL gameplay, and more.
- After this, click the blue record button to start capturing your gameplay.
You can use Joyoshare to schedule a screen recording to start at a specific time.
When you’re finished recording, save the file as an AVI or MP4 for easy viewing and sharing.
With Joyoshare Screen Recorder for Windows, you can easily capture your favorite Steam gameplay and share it with your friends and followers.
Using OBS Studio
As a Steam user, you might want to consider using OBS Studio for recording your gameplay.
This powerful open-source software can capture high-quality video and audio from your computer screen, making it an ideal choice for gamers who want their recordings to look and sound professional.
The best thing about OBS Studio is that it offers several customizable recording settings that allow you to tweak various parameters such as the bitrate, resolution, and frame rate of your videos.
With these options, you can optimize the quality of your recordings based on your desired output format or platform.
Keep in mind that when using OBS Studio, it’s important to ensure that you have enough system resources available for optimal performance.
That means closing any unnecessary programs or tabs running in the background to maximize CPU usage during the gameplay session.
To record your Steam gameplay using OBS Studio, follow these simple steps.
# Step 1: First, launch OBS Studio.
# Step 2: Navigate to Sources.
# Step 3: Then click on the plus sign icon.
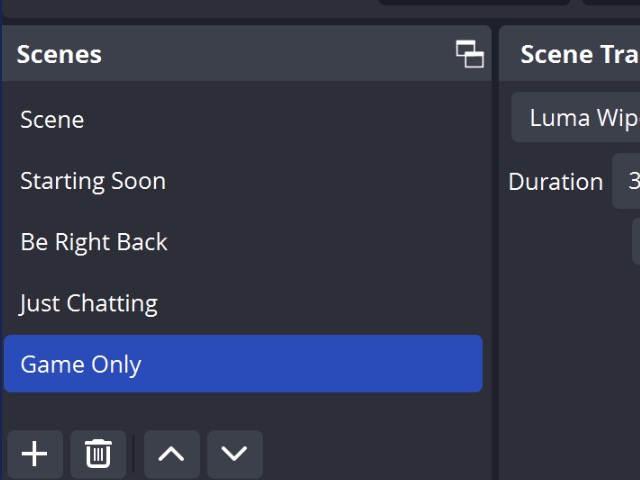
# Step 4: In the Sources box, create two scenes.
# Step 5: In the first scene, add a Window Capture of the LoL launcher/lobby, and in the second scene, run the game to add a Game Capture.
# Step 6: Once you have set up your scenes, go back to the game and press the Hot Key to record the game screen without a watermark.
# Step 7: When you’re done recording, press the Hot Key to deactivate.
OBS Studio is highly recommended for recording Steam gameplay because it is free and works well.
You can also use OBS to stream your gameplay on sites like Twitch, YouTube, or Facebook Live.
If you want to capture your webcam feed with OBS Studio, add your webcam as a source by going to the Sources menu.
With OBS Studio, you can easily capture and share your Steam gameplay without any hassle.
Using NVIDIA ShadowPlay
As a Steam user, you have access to powerful software for recording your gameplay.
One such option is NVIDIA ShadowPlay, which comes free with Nvidia graphics cards.
With this built-in software, you can easily record and share your highlights on social media platforms like Facebook and YouTube.
To start using NVIDIA ShadowPlay, simply activate the “Allow” option in NVIDIA GeForce Experience > Preferences > ShadowPlay preferences.
This will allow you to enable OpenGL games that do not work with ShadowPlay otherwise.
With the ability to save the last 30 seconds of gameplay or manually record entire sessions at high-quality frame rates, players can easily showcase their gaming skills.
Overall, if you are looking for a reliable and easy-to-use screen recorder for Steam gameplay recording, then NVIDIA’s Shadowplay has got it covered.
The feature-rich software even lets users customize recording settings according to their preference and create unique overlays using third-party tools like OBS Studio – making it an excellent choice for gamers who demand quality output from their recordings.
Using AMD ReLive
As a Steam user, you can also use AMD ReLive to record your gameplay.
This software is easy-to-use and offers additional features such as instant replay and screen recording.
You can access AMD ReLive through the Radeon Software app on your computer.
# Step 1: First things first, make sure you have AMD ReLive installed on your PC.
# Step 2: Open Radeon Software on your computer by pressing the Windows key S and selecting Radeon Software from the options.
# Step 3: Once you have Radeon Software open, click on the Recording tab.
# Step 4: From there, make sure to enable the Instant Replay feature.
# Step 5: Now, click on In-Game Replay to enable this specific feature.
# Step 6: You can then set up the hotkeys for recording gameplay with Radeon.
# Step 7: If you are experiencing performance issues, make sure to adjust the Recording Settings in the Radeon software.
# Step 8: Record your gameplay by using the hotkeys set up in Step 6.
# Step 9: If you want to edit your clips, you can easily do so by using the built-in editing tools in the Radeon software.
# Step 10: Finally, save your recorded gameplay wherever you desire on your computer.
Using AMD ReLive to record gameplay is a great way to capture key moments in your gaming experience with ease.
With these steps in mind, you can rest assured that you will be able to record your Steam gameplay without any issues. Happy recording!
Choosing The Best Technique For You
When it comes to recording Steam gameplay, there are various techniques you can use.
However, not all of them will work best for you. It’s essential to consider several factors when selecting the ideal technique that fits your needs.
For instance, if you’re looking for a user-friendly interface and quick access to basic functionality, using Windows Game Bar or Xbox Game Bar may be your go-to tools.
On the other hand, if you want maximum control over advanced features such as custom overlays and personalized settings, OBS Studio or Bandicam would be more suitable options.
If you have an NVIDIA graphics card or AMD GPU in your computer system, ShadowPlay and ReLive offer impressive hardware acceleration capabilities that reduce performance impact while recording high-quality videos.
Therefore assessing what exactly suits user preference is vital before making any decision on choosing a technique.
In summary, with so many options available for recording Steam gameplay videos out there; identifying the one that works most satisfactory for users depends primarily on their unique set of preferences and requirements.
Understanding these aspects will help them choose wisely among the available options above with respect to easy access to functionality and personalization offered by each option they might consider using frequently when capturing video game footage.”
Tips And Tricks For Enhancing Your Recording Experience
Below I discussed some of the tips to enhance your Steam Gameplay recording experience.
Adjusting In-Game Settings And Resolution
When it comes to recording your Steam gameplay, adjusting in-game settings and resolution can make a big difference in the quality of your recordings.
By lowering graphics settings and resolution, you can increase FPS and reduce lag while recording.
Disabling features like VSync or anti-aliasing can help improve performance.
It’s important to note that not all games have the same optimization options.
Some may require more tweaking than others to achieve better performance while recording.
Experiment with different settings to find what works best for you and your specific game.
By taking the time to adjust these in-game settings and resolution before hitting record, you’ll be able to capture smooth gameplay footage without sacrificing quality.
So take some time to optimize your game before starting your next recording session!
Using A High-quality Microphone And Webcam
When recording Steam gameplay, it’s important to use a high-quality microphone and webcam to enhance the overall experience.
An external microphone can greatly improve the audio quality of your recordings, ensuring that your voiceovers or commentary come out clear and crisp.
Similarly, using a dedicated camera rather than relying on a built-in one can significantly enhance video quality, providing viewers with a smoother and more visually appealing experience.
Following our tips and tricks for recording yourself in professional quality is especially helpful when you’re looking to create content that stands out from the rest.
Proper lighting techniques can help ensure good picture quality, while using editing software allows you to add interesting effects or annotations to your videos.
With so many options available for high-quality microphones and webcams on the market today, incorporating these tools into your setup should be an easy way to elevate your Steam gameplay recordings without much extra effort needed.
Editing And Enhancing Your Recordings With Software
After recording your Steam gameplay, the next step is to edit and enhance your recordings with software.
There are various editing tools available, ranging from simple video trimming to adding special effects and transitions.
One popular tool recommended by the article is Filmora X, which allows easy editing of recorded gaming footage.
Another useful feature of editing software is its ability to add audio commentary or background music.
This not only enhances the viewer’s experience but also adds a personal touch to your recordings.
You can use audio recording software like Audacity or Adobe Audition to record commentary through a microphone.
Remember that while post-production may take some time, it ultimately makes for more engaging content that viewers will appreciate.
So take advantage of these tools and make sure your recordings stand out among other gamers on Steam!
Sharing Your Videos On Social Media And Gaming Platforms
Once you have recorded your Steam gameplay, the next step is to share it with your friends and followers on social media and gaming platforms.
Social media platforms such as Facebook, Twitter, Instagram, and YouTube are great for sharing content with a wider audience.
Gaming platforms like Twitch are ideal for sharing gaming-specific content.
Before you start sharing your videos, make sure they are edited and enhanced using video editing software.
You can add captions or commentaries to your videos to make them more engaging. It’s also essential to use relevant hashtags when posting on social media to increase visibility.
Sharing your Steam gameplay videos is an excellent way to connect with other gamers who share similar interests.
Your video may inspire others or show them new techniques they may not have seen before.
With so many options available for sharing video game footage, there is no excuse not to let the world see what you’re capable of!
Creating A Consistent Recording Schedule
Creating a consistent recording schedule is essential for any serious gamer who wants to achieve success.
By planning and sticking to a set schedule, you can ensure that you have enough time to prepare, record, and edit your videos properly.
This also helps build anticipation among your viewers since they know when they can expect new content from you.
To create a consistent recording schedule, determine how much time you can spend on gaming and filming each day or week.
Then decide on the best time of day for your recordings based on your availability and preferences.
Remember to take breaks between sessions to avoid burnout and maximize productivity over the long run.
In addition, it’s crucial to communicate with your audience about when new content will be available.
For instance, if you plan to release videos every Friday at 7 PM EST, let them know ahead of time through social media platforms such as Twitter or Instagram stories.
Consistency builds trust with your viewers and strengthens their loyalty over time.
Engaging With Your Audience
Engaging with your audience is a crucial element of creating high-quality and engaging gameplay content.
One way to do this is by responding to comments on your videos or streaming sessions, whether it’s thanking viewers for their support or answering questions about the game you’re playing.
It’s important to make an effort in promoting your streams and videos through social media platforms like Twitter and Facebook, which can help attract new viewers who may be interested in watching you play.
Another way to engage with your audience is by incorporating user-generated content into your gameplay recordings.
You can ask viewers to submit clips of their own gameplay experiences related to the game you’re playing, and then include those clips in future episodes of your series.
Not only does this add variety and fresh perspectives to your content, but it also helps build a sense of community among your viewers who feel more invested in what you’re doing as a gamer.
Common Recording Mistakes To Avoid
Avoid overwhelming graphics settings, poor sound quality, wrong recording device settings, inconsistency in the recording schedule, and ignoring your audience.
By avoiding these common mistakes you’ll be on your way to creating high-quality Steam gameplay recordings that will impress your viewers.
Keep reading for more tips and tricks on enhancing your recording experience!
Overwhelming Graphics Settings
One of the most common mistakes when recording Steam gameplay is having overwhelming graphics settings that can negatively impact your recording performance.
High-resolution textures, anti-aliasing, and other graphics-intensive features may look great in-game but can cause stuttering, lag, or crashes while recording.
It’s important to find a balance between visual fidelity and smooth performance.
To avoid these issues, try adjusting your in-game graphics settings before starting a recording session.
Lowering the resolution or disabling certain graphical effects may help alleviate any potential problems with frame rates or overall performance.
Additionally, closing any unnecessary background programs can also free up system resources and improve your PC’s ability to handle both gaming and recording tasks simultaneously.
By fine-tuning your graphics settings and optimizing your PC for gameplay recordings using third-party software like OBS Studio or NVIDIA ShadowPlay, you’ll ensure smoother gameplay recordings without sacrificing quality visuals.
Poor Sound Quality
Recording Steam gameplay can be a rewarding and exciting experience, but poor sound quality can easily ruin your efforts.
One of the most common issues in recording audio is backing tracks being too quiet and sound being too bassy.
These problems can be avoided by using proper settings for your microphone and game audio.
Thankfully, there are solutions to improve the quality of recorded audio when capturing Steam gameplay.
Using an external microphone instead of relying on the built-in one on your device can significantly improve the overall sound quality.
By adjusting settings such as gain levels and input sources, you’ll be able to achieve optimal results that complement your excellent gaming skills.
Wrong Recording Device Settings
One of the most common mistakes in recording Steam gameplay is using the wrong recording device settings.
It’s easy to accidentally leave the default audio source as your computer’s built-in microphone, rather than selecting a high-quality headset or external microphone.
This results in audio that is muffled or filled with background noise.
To avoid this mistake, make sure to check and adjust your audio settings before you start recording.
Choose the right audio source for your commentary or voiceovers, and ensure that it is set at an appropriate volume level.
With proper sound quality, you can provide clear and engaging content for your viewers without any unnecessary distractions.
Consider investing in a high-quality external microphone that helps capture crystal-clear sounds.
A good mic can significantly improve voice quality and overall content production value.
So, always be sure to double-check your recording device settings before capturing Steam gameplay footage so that you can provide top-notch content for gaming enthusiasts who love watching gameplays on streaming platforms like Twitch or YouTube Gaming!
Inconsistency In Recording Schedule
It’s important to maintain consistency in your recording schedule when capturing gameplay on Steam.
Otherwise, you risk losing out on viewers who expect regular content.
Inconsistent scheduling can throw off your own rhythm and make it harder to stay motivated.
To avoid these pitfalls, try setting a specific day or time each week for recording sessions.
Not only will this keep you accountable, but it can also help you build anticipation and momentum among your audience.
In addition to maintaining a consistent schedule, be sure to communicate any changes or delays with your viewers as soon as possible.
Keeping them in the loop builds trust and respect between you and your audience while preventing confusion or disappointment caused by sudden shifts in content delivery.
Remember that reliability is key if you want to grow an engaged following of loyal fans eager for more high-quality gameplay recordings from Steam!
Ignoring Your Audience
As a Steam user, it’s easy to get wrapped up in the process of recording your gameplay and forget about your audience.
However, ignoring your viewers can lead to decreased engagement and ultimately affect your channel growth.
It’s essential to interact with your audience by responding to comments, questions, and feedback.
Engaging with your audience can also help you understand their preferences regarding content style, gaming genres, video duration, etc.
This information will equip you better to create videos that cater to their interests and keep them coming back for more.
So be sure not to ignore the people who are watching you play!
It’s crucial to maintain consistency in releasing new videos and sticking to a set schedule so that your audience knows when they can expect new content from you.
Failing to do this may cause them to lose interest or move on entirely from following your channel.
Always consider the impact of neglecting or underestimating the importance of connecting with viewers while recording Steam gameplay.
Troubleshooting Common Recording Issues
Encountering common recording issues like low FPS, audio and video synchronization, or recording software crashes can be frustrating, but don’t worry, our guide has got you covered with tips and solutions to troubleshoot these problems.
Keep reading to ensure a smooth and successful recording experience on Steam!
Low FPS
As a Steam User, you may have experienced low FPS or choppy video clips while recording gameplay.
This issue can be caused by various factors such as an incompetent CPU/GPU, insufficient memory space, and improper video processing methods.
If your computer doesn’t have enough resources to record while gaming, it can result in poor or reduced FPS in games.
To avoid low FPS issues when recording Steam gameplay, make sure to invest in a powerful CPU that can handle the load of encoding recorded footage.
One common mistake is setting capturing quality settings (resolution and FPS) higher than what the system can handle.
This often results in faulty videos and choppy clips.
By optimizing your graphics settings and choosing suitable recording modes, you’ll enjoy smooth recordings without any lag or low FPS issues on Steam games.
Audio And Video Synchronization
When recording Steam gameplay, it’s important to ensure that the audio and video are properly synchronized.
Nothing is more frustrating than watching a video where the sound doesn’t match up with what you’re seeing on-screen.
To avoid this issue, make sure your recording software has an option for syncing up the two elements.
One way to synchronize audio and video when recording Steam gameplay is to use OBS Studio.
This free software allows you to adjust your audio settings while also providing numerous options for adding customizations such as watermarks or overlays.
Make sure that your microphone and camera are placed close enough together so there’s no lag between them.
If you’re still having trouble synchronizing audio and video after following these tips, check out some online forums for advice from other gamers who have run into similar issues.
You can often find helpful solutions by simply searching Google or YouTube for tutorials on how to record high-quality Steam gameplay videos with perfectly synced sound and visuals.
Recording Software Crashes
As a Steam user, you know the frustration of having your recording software crash midway through an epic gaming session.
It can be extremely frustrating and even result in the loss of valuable footage. Fortunately, there are ways to troubleshoot this issue.
One common reason for recording software crashes is conflicting with other programs running on your computer.
By closing unnecessary applications and disabling any antivirus software temporarily when recording gameplay, you may be able to avoid this problem altogether.
Another solution is upgrading your hardware specifications such as graphics card, RAM or getting an SSD to ensure that your computer can handle high-performance gaming sessions without crashing frequently due to insufficient resources on the system.
With these tips in mind, you’ll soon be able to record quality gameplay videos without worrying about crashes disrupting your experience.
Overheating And System Crashes
As a Steam user, one of the most frustrating things when recording gameplay is experiencing system crashes due to overheating.
Overheating occurs when your computer’s processor and graphics card generate too much heat during extended gaming sessions.
When this happens, the hardware can become damaged or slow down performance, causing stuttering and crashes.
To prevent overheating from impacting your recording experience, it’s important to monitor your computer’s temperature closely while gaming.
You can use software such as Open Hardware Monitor or Speedfan to keep an eye on your temperatures and make sure they don’t exceed safe levels.
Consider investing in proper cooling for your system like fans or liquid cooling systems to reduce the risk of overheating.
By taking these steps, you’ll be able to record Steam gameplay without worrying about system crashes caused by overheating.
With optimized settings and proper cooling solutions in place, you’ll have a smoother recording experience with minimal interruptions.
Frequently Asked Question
Does Steam Have a Built-in Screen Recorder?
No, Steam does not have a built-in screen recorder.
How Can I Record Gameplay on Steam?
There are several ways to record gameplay on Steam, including using third-party software such as Bandicam, OBS, and Simple Video Recorder.
You can also use the default recording tool on Windows, Game Bar, to record your Steam gameplay.
How Do I Use Game Bar to Record My Steam Gameplay?
To use Game Bar, open the Steam game you want to play and press Windows Alt R keys together to start recording your gameplay.
You can also press Win G to bring up the Game bar and start recording from there.
Is Recording Gameplay on Steam GPU-Dependent?
Yes, recording gameplay is entirely GPU-dependent, so it depends on which GPU you are using. If you are using onboard graphics, video editing may be more challenging.
What is The Best Option For Recording Gameplay on Steam?
If you are running Windows 10, Xbox Game Bar will be a good option for recording gameplay on Steam.
However, other third-party software such as Bandicam, OBS, and Simple Video Recorder are also good options. It ultimately depends on your preferences and needs.
How Do I Record Last 30 Seconds on Steam?
To record the last 30 seconds on Steam, you can use the hotkey Windows Alt G key.
Alternatively, you can go to Start > Settings > Gaming, and press Win Alt R to begin recording your gameplay.
How Do I Record Steam Games With OBS?
To record Steam games with OBS, follow these steps:
1. Start OBS and go to the “Sources” section
2. Click the ” ” button and select “Game Capture”
3. In the “Mode” dropdown menu, select “Capture specific window”
4. In the “Window” dropdown menu, select your Steam game
5. Click “OK” to confirm settings and then click “Start Recording” or “Stream” to begin capturing your gameplay.
Note: If you encounter issues with game capture, you can try running OBS as an administrator or try using the “Display Capture” mode instead. Also, make sure that you have enough storage space on your computer to save the recordings.
Does Steam Save All Screenshots?
Yes, when you press the F12 key on your keyboard while playing a game on Steam, your system captures a screenshot and saves it to Steam.
However, screenshots created through third-party software cannot natively be uploaded to the Steam Cloud.
Does Steam Record Game Time In Offline Mode?
Steam does track time played even if it occurs in offline mode, but the hours will not be added to the total time played on your profile until you are back online.
However, Steam Replay does count all of your playtime for online games and presents it in an infographic style.
If you want to see the total time played on Steam, you’ll have to click through each game and add up the times unless you use a third-party software.
It is important to note that Steam cloud is the part of Steam online, so saving is not possible while you are offline.
Lastly, if you create a new account and share games from the main account using Steam Family Sharing, the hours will count on both accounts.
Conclusion
In conclusion, recording your Steam gameplay has never been easier with the numerous software and built-in features available today.
Whether you’re a seasoned gamer or just starting out, capturing your gameplay allows you to share your exceptional gaming skills with others and create engaging content for social media platforms.
With this comprehensive guide, you now have access to top-ranked built-in screen recorder programs such as Bandicam and Fraps along with advanced settings that will take your recordings to the next level.
Don’t forget to follow our best practices for high-quality recording and engaging with your audience for maximum impact!
So what are you waiting for?
Start recording those epic moments in your favorite games on Steam today!